3D printing terrain maps

npaden

Well-known member
Joined
Feb 3, 2011
Messages
4,908
Location
Lubbock, Texas
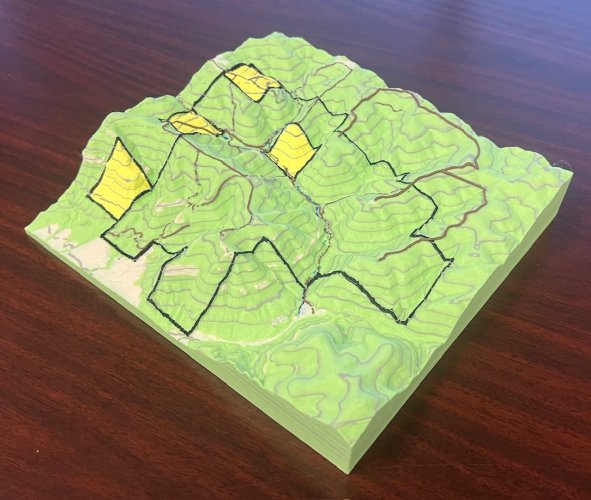
We upgraded our 3D printer to one that can print multiple colors and I’ve done some learning on stuff like LiDAR maps, QGIS, Blender, GPX extruder and converters and fun stuff like that and am pretty happy with the end result.
IMG_9125.jpeg
IMG_9123.jpeg
IMG_9122.jpeg
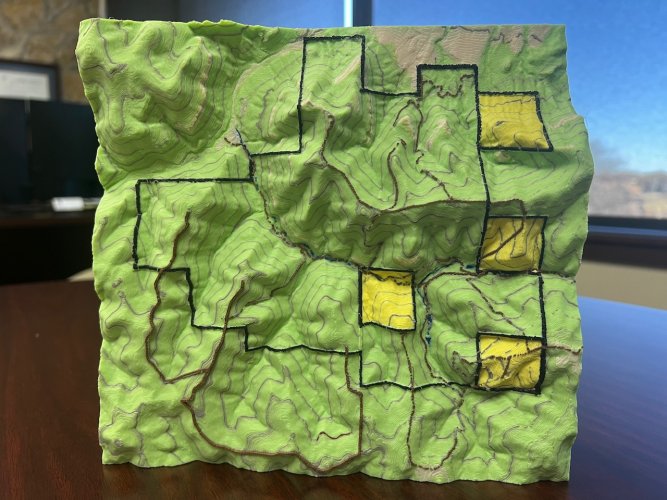
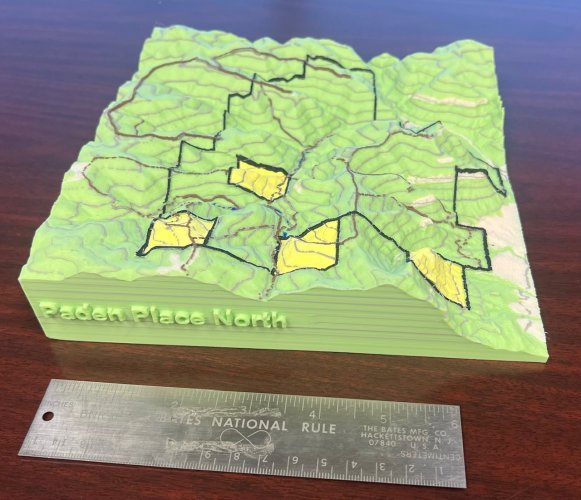
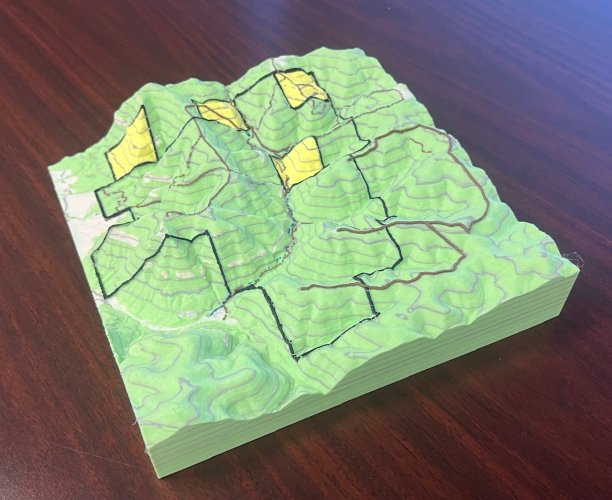
This is our property in Colorado.

Contour lines are at 100’ increments. I did double thickness on the contour lines at 6,500' and 7,000'. Had a little mess up that made the 6,900' line a little thicker too but it was going to be too much work to fix so I left it a little bit thicker too. Black is the property boundary, yellow is BLM, then light color is either clearing or cliffs, I tried to pretty much take a topo maps and render it in 3D. Brown is roads, the main roads are a little wider and the trails are smaller and some of those ended up with some gaps but I think that emphasizes that they are trails and not roads.

It took the printer 35 hours and 861 color changes to print it. It probably took me almost that many to figure everything out and get it ready to print.

Now that I know how to do it I’m hoping I can help my 17 year old son leverage that into a side gig making these for other people. I think another market for them might be for hikers or trail runners who want an overlay of their GPS path placed over a terrain map.

The LiDAR stuff is pretty amazing, I saw things on the LiDAR map that I hadn’t noticed on my own property even looking at it in person. The 3D printer isn’t quite precise enough to get everything to show up that you can see on a computer screen but it does a decent job. For sure better than just a Google Earth terrain map.

Oh well, thought I would share.

Nathan
 
That is very cool. You should have no problem finding clients for your son to make some money! Is he required to give you a portion of each sale to pay off the printer?
 
Very cool and yes there is a market for it, get your son trained up and post back when you are ready to try another.
 
That's neat, in the East those lines would more than likely follow the ridgelines and not be square. I think a bright red property line along a ridge would look really cool. What size is your print bed? Could you do 12x12"? I'd like one 30x30 of the family farm and the piece I bought that attaches to put legs on and fill with epoxy to make a table.
 
Also, the LIDAR maps are amazing, will help you understand your property more than walking around, can see old skid roads, benches that may be hidden by trees or brush, etc.
 
That is very cool. You should have no problem finding clients for your son to make some money! Is he required to give you a portion of each sale to pay off the printer?
The printer tells us how much the print cost in filament. This print cost $13 of filament to print. He has to pay me whatever that is on things he sells. Then we split the remaining profit on any sales he makes but that piece goes toward the cost of the printer. If he sells enough to where the piece he pays me equals the cost of the printer then he can keep the printer.

We are using a Bambu Labs PS1 printer. The printer really isn't that expensive, but the automated material systems (AMS) that allow you to print the multiple colors are a bit pricey. To do 8 colors (this map had 7).
 
Also, the LIDAR maps are amazing, will help you understand your property more than walking around, can see old skid roads, benches that may be hidden by trees or brush, etc.
LiDar .jpg
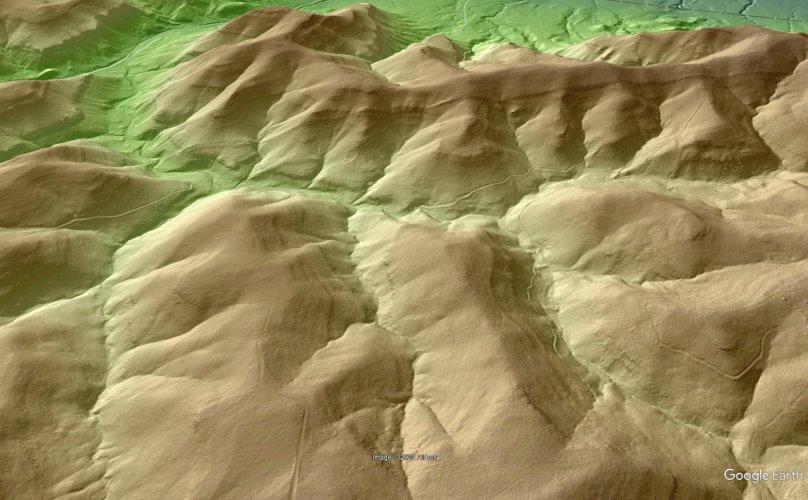
Here's a screen shot of a LiDar overlay I put in Google Earth. You can clearly see the trails and roads. There is some kind of fault line running along the ridge that I never noticed looking at it in person but it is very clear on the LiDar.
 
That's neat, in the East those lines would more than likely follow the ridgelines and not be square. I think a bright red property line along a ridge would look really cool. What size is your print bed? Could you do 12x12"? I'd like one 30x30 of the family farm and the piece I bought that attaches to put legs on and fill with epoxy to make a table.
The print bed is essentially 10"x10". I can do that size in one color, but if you are printing multiple colors then you have to have a color tower for when it is switching color so about the largest in color would be 10"x8".

Here’s one in one color. That is very easy to do compared to the full blown topo map one.

IMG_9027.jpeg
 
I work professionally with LiDAR and QGIS often, and I've messed around with blender in my free time. I've never seen someone transfer those models to a 3D printer, and it's exciting to see. I could imagine you and your son's business taking off and I hope it does. That's really a beautiful way to see your land.

Something I've thought was kind of neat, was looking at large areas with LiDAR-derived contours that are absurdly close. I'm trying to imagine how or even if such visualizations could transfer to a 3D printer, which is something I know nothing about, but here's an example.

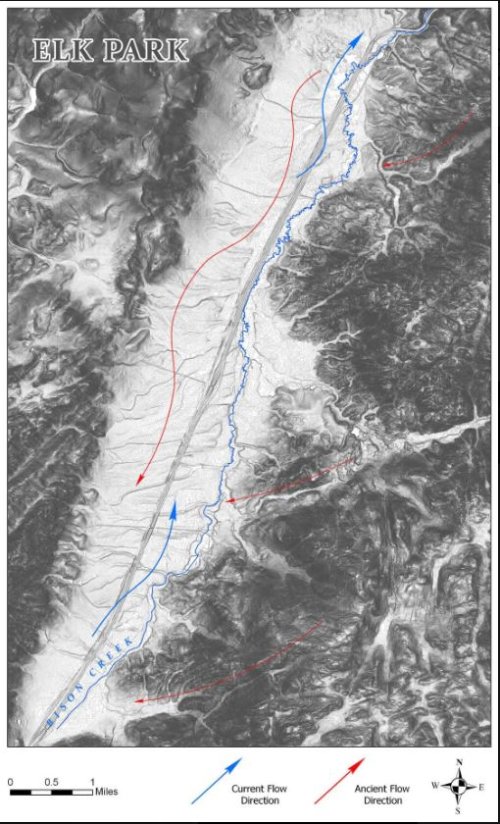
This is Elk Park, Montana - a high elevation valley many miles long surrounded by even higher country. What you are looking at are 1 foot contours drawn at a very thin line width. The end product looks intentionally artistic and shaded, but it's just contour lines that are very close. It would be neat to see if Q could handle it.

Elk Park Is A Valley That Tilted.JPG
 
I work professionally with LiDAR and QGIS often, and I've messed around with blender in my free time. I've never seen someone transfer those models to a 3D printer, and it's exciting to see. I could imagine you and your son's business taking off and I hope it does. That's really a beautiful way to see your land.

Something I've thought was kind of neat, was looking at large areas with LiDAR-derived contours that are absurdly close. I'm trying to imagine how or even if such visualizations could transfer to a 3D printer, which is something I know nothing about, but here's an example.

This is Elk Park, Montana - a high elevation valley many miles long surrounded by even higher country. What you are looking at are 1 foot contours drawn at a very thin line width. The end product looks intentionally artistic and shaded, but it's just contour lines that are very close. It would be neat to see if Q could handle it.

View attachment 314747
The limiting factor is going to be the thickness of the filament or the print head. The standard print head we are using is .4mm so essentially that is the minimum width you can print. You can buy narrower print heads .2mm is an option I know, but then you are talking twice as long for the same print. On thickness you can get to a smaller thickness just by moving the print head faster at a higher flow rate but even then unless you are printing very large scale you are not going to be able to get down to 1' increments even if you have a LiDAR image that is that detailed. You can add in vertical exaggeration but that is still going to be difficult to show at a scale in mile like your valley.

The scale on the print on my land is around 20:000 to 1. The elevation change is roughly 1,000 feet total and there were 211 layers on the print so that would put each print layer at roughly 5 feet.

I was surprised at the detail on the LiDar maps out west. Better than my property south of me here in Texas. That LiDAR wasn't very detailed at all.

If you wanted to go nuts you can do photogrammetry where you fly a drone over your property in grids back and forth multiple times at different elevations and angles and then convert that to a 3D print. Technology is really moving fast on some of this stuff.
 
This is exceptionally cool. If you are looking at selling these please reach out. Would love to have them to show kids and new hunters layout of hunting area prior to getting them in field.
 
That is very cool and I think your son will do very well with it as a side gig after he perfects the techniques.

When we were in the planning stages of our nature center we wanted to do a satellite image map overlayed on the topography of the Driftless Area similar to what you have done. We decided that the scale of the map and amount of relief would not be accurately portrayed so we just went with a satellite image of the 24,000 sq mile area. I do have a 2'x2' mockup of it somewhere in the storage room I should dig out. I have also seen where they do the opposite and do laser engraving to show the contours of a lake or river.
 
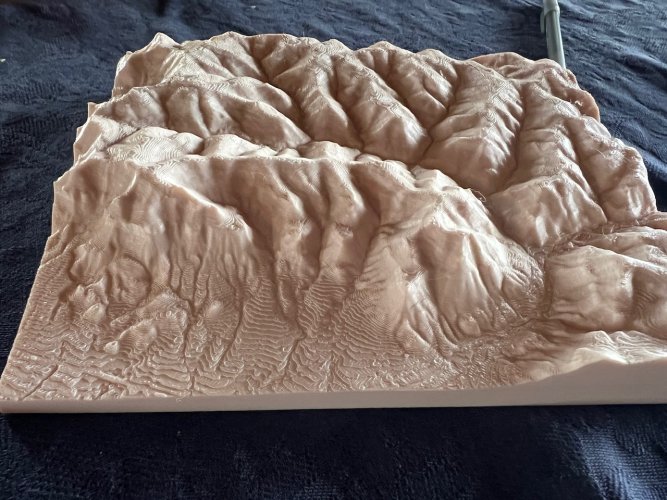
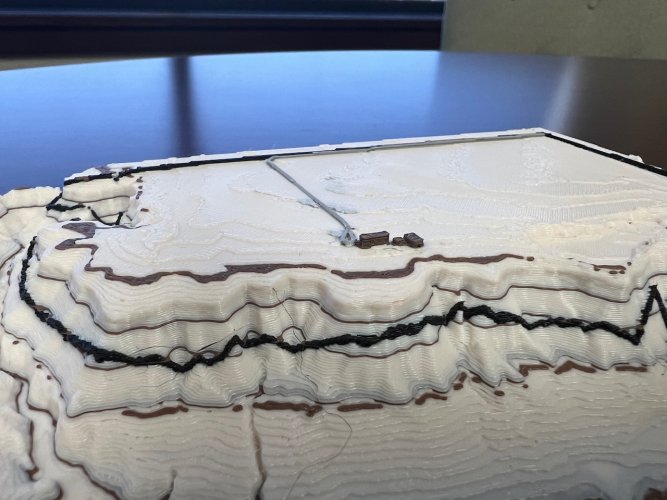
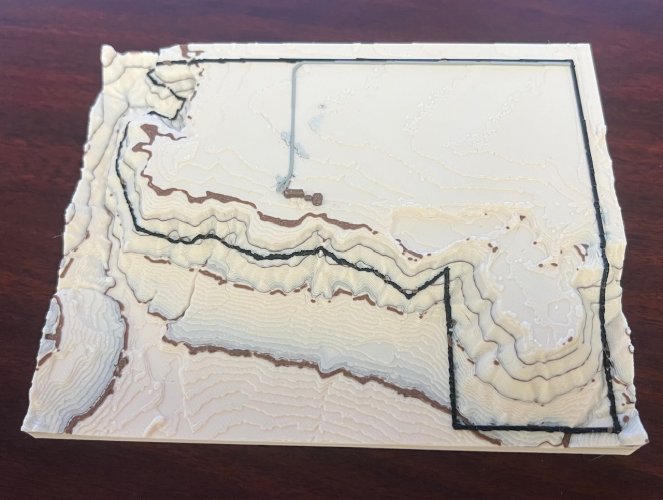
I did one of the land my house is on too.

IMG_9127.jpeg

I added the house and barn as 3D features sized pretty accurately.

The topo lines here are spaced at 25 feet. Since this property is much flatter I used 2x vertical exaggeration on the terrain.IMG_9128.jpeg

With it being much flatter the topo lines end up thicker. I was trying to save waste on the filament and that’s why there is some bleeding over on the contour lines, especially on the flatter part.

To me these look better in real life than the pictures. Taking these pictures I notice imperfections like the black filament in the close up with the house and barn that I didn't even see until posting the picture.
 
We upgraded our 3D printer to one that can print multiple colors and I’ve done some learning on stuff like LiDAR maps, QGIS, Blender, GPX extruder and converters and fun stuff like that and am pretty happy with the end result.
View attachment 314723
View attachment 314724
View attachment 314725
This is our property in Colorado.

Contour lines are at 100’ increments. I did double thickness on the contour lines at 6,500' and 7,000'. Had a little mess up that made the 6,900' line a little thicker too but it was going to be too much work to fix so I left it a little bit thicker too. Black is the property boundary, yellow is BLM, then light color is either clearing or cliffs, I tried to pretty much take a topo maps and render it in 3D. Brown is roads, the main roads are a little wider and the trails are smaller and some of those ended up with some gaps but I think that emphasizes that they are trails and not roads.

It took the printer 35 hours and 861 color changes to print it. It probably took me almost that many to figure everything out and get it ready to print.

Now that I know how to do it I’m hoping I can help my 17 year old son leverage that into a side gig making these for other people. I think another market for them might be for hikers or trail runners who want an overlay of their GPS path placed over a terrain map.

The LiDAR stuff is pretty amazing, I saw things on the LiDAR map that I hadn’t noticed on my own property even looking at it in person. The 3D printer isn’t quite precise enough to get everything to show up that you can see on a computer screen but it does a decent job. For sure better than just a Google Earth terrain map.

Oh well, thought I would share.

Nathan
Your posting revives a half-century-old memory, which you might find interesting. It is one that reminds me of what a tedious task it was to produce such physical terrain models back when I was old enough to be drafted but could be arrested for buying a beer.

However, before I describe a process that I witnessed underway in 1969 at the Wildlife Institute of the University Of Alaska (Fairbanks), please indulge my curiosity and disclose the size of those yellow, BLM holdings on your model. Are they sections, or quarter sections? Either way, it seems that you hold a substantial and enviable piece of property! Is the stream flowing east-to-west perennial? Have you evaluated the hydro-electrical potential there?

When I was a freshman unable to enroll mid-term in an already-full photography class at UA in order to use the class's darkroom, a friend who was a post-graduate Master of Wildlife Management candidate suggested I see an employee of the Wildlife Institute to inquire about after-hours use of the darkroom. The person whose name and official job title I am ashamed to admit I have forgotten--I'll call him a visual arts technician--controlled a darkroom, which he only used during working (daytime) hours as part of his workspace.

When visiting, I saw on a table in the man's office/workshop, a 3D terrain map, three or four feet square, in the early stages of production. Each elevation contour was represented by a thin sheet of paraffin wax stacked upon a wax cutout of the previous lower elevation. While precise details are lost to time, I seem to recall that the layers were developed by laboriously tracing the outline of each elevation contour from a topographic map projected onto a large sheet of paper that then had to be transferred onto one of the wax sheets, cut to shape by hand, and placed in accurate register on the preceding elevation.

As the artist explained, he would, after adding the apex layer, smoothly blend the stacked layers using heated tools similar to pallet knives and clay-sculpting spatulas. Completing the smoothing, he would have a positive "plug" from which he'd need to produce a negative mold.

The next step required producing the mold by coating the plug with the mold material--I can't recall if it was silicone rubber or some other material, which would then have to be pulled, cleaned, and coated with a release agent to prepare the mold for casting the permanent, positive model. Again, I can't remember if the final model was cast in plaster of Paris, fiberglass, or some other material. I do remember, and it should be obvious, that the model woud still have to be painted to present the same features as the 2D paper map would have conveyed.

I'm sure that a substantial learning curve was required to produce the 3D-printed model of your land as well. However, perhaps my relating of earlier techniques will make those seem less daunting?


WL
 
This is very cool. I’m a huge map geek. How big is the property in your first map? Trying to picture what some of my favorite drainages would like.
 
Yes, this was a chore to work on from the 3D model perspective, but I'm sure nothing like working it with wax paper and hand drawing and cutting. Holy cow that would be a chore.

The yellow squares are just little 40 acre pieces so not quite as enviable but it's mine and I'm happy with it. The deeded piece is 936 acres. No idea why BLM has such tiny little inholdings.

The creek is intermittent. I have one tiny little spring that flows about 5 or 6 gallons an hour that is very dependable even in the driest weather but the creek is usually dry.

We haven't printed anymore of these. It was a lot of work. One option that I have thought about is printing them larger scale by printing multiple pieces and then putting them together. That would actually be pretty easy to do in the software but then it would cost close to $50 to print it.
 
Caribou Gear

Forum statistics

Threads
114,316
Messages
2,052,593
Members
36,550
Latest member
Emptyfrzrdeertzr
Back
Top