Caribou Gear Tarp

Truth Of Forges

Thanks for the compliments on the Anvil. It was a fun project. I use it for lots of stuff, not just knives.
I had to go measure the height. I'm 6' and My anvil is 33" tall as well. I didn't plan it that way, that is what felt good to me when I mounted it to the log.

I got that railroad track at a yard sale. I asked the guy how much and he said if I would haul it off I could have it. I about threw my back out getting in the truck before someone else asked about it. lol
 
Thats a hoot! Glad you muscled those onto your truck bed. I'm the same height... 6'01" as the two of you @NMGuy and you so your assessment for height will work well for my intent.

Thanks guys and everyone for the collective input. Hope it's a thread others might find useful as well. I'll be sure to share my follies along the way. :)
 
I like this - I love the idea of making something with my hands - for myself and for gifts. I've been kind of looking at this and my biggest issue is no space and already feeling overwhelmed with lack of time. This is so cool - Good Luck to you. I actually am on the wait list for a custom from a Forged in Fire Champ right now.
 
What i've seen recommended is to stand up straight with your arms at your sides. Make a fist with one hand and the height of your knuckles should be about right, maybe a touch higher than that. I'm 6'1" and that gives me about 32". The surface of my anvil is at 33" and feels good to me.
32" is standard height for dining tables and saw horses.
It's a pretty standard height......unless you're an architect! LOL!

My "anvil" is a 20" section of 90# rail and a side bearing out of a rail car.
 
My "anvil" is a 20" section of 90# rail and a side bearing out of a rail car.
I've been on the hunt for rail tracks since @elkantlers shared pic of his. The character of that is so DIY fantastic - I would pay more to have that type of anvil than a quality couple hundred pound defined anvil. Pardon the word though it looks badass and fits the comfort of my usual crafting.
It's a royal PITA to find rail track! I tried begging our Whitefish train depot and it was as if I was asking for someone's first born. haha! They were friendly but it was a solid no joy - without room for me to wiggle a bit...

Do you have or would you mind taking a pic of yours? I'm not sure what a "side bearing" is from a rail car.
 
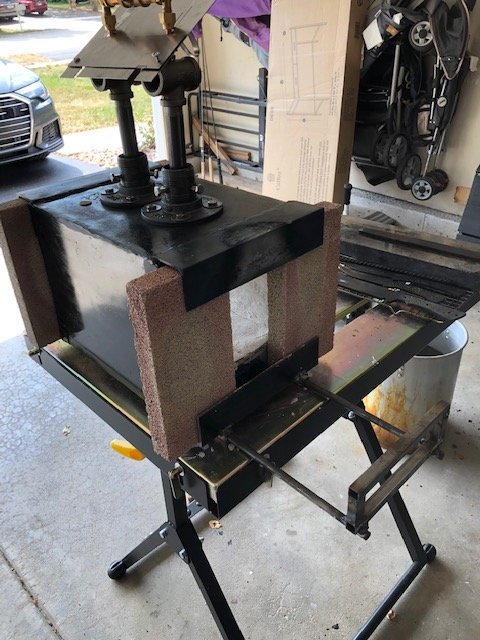
So... next project as I just stepped over the line into the DIY $$$ land. Fabricate a forge fitting the general size and shape of the Majestic Forge mentioned in the OP.


I purchased 16g steel for the exterior structure matching the size, as shared on their website:
The forge box is 18 ¼” long 9” deep and 7 ½” high.
The interior heat chamber is 15” long 7 ½” deep and 4 ½” high.
With front opening 15” wide by 4 ½” high.
It has 3” by 4” openings on both ends for working bar stock or knife and sword making and long items.

My thoughts for products... If you have any critical or other input, please share. I'm all ears while in DIY mode:

Floor:

Forge sides and ceiling:

Burners:
This is a touchy area as I don't plan to play KaBoom! I'm not adept to thrusted fire builds. With that said and YouTube giving me the proverbial "liquid courage", I'm contemplating this build, thoughts?


Propane tank:
Question - Does a tank really have to stand upright for a transport to/from filling station? I looked at purchasing two 40#'ers so I'd be able to transport standing though they would be almost 3x's the price of one 100#'er!

Anvil:
A friend with a train company and another at one of our steel / recycling facilities are keeping their eye out for rail track. Hope one of the two happen across 7'. That would be awesome! I priced an anvil, retail... looking @ $800-1500 for a 120#!!! Checking for estate and auction sites as well. I dig the character! Nothing spells out DIY like that anvil! Haha! Too much character to pass up! :)
In the meantime, a temporary holdover as it's not hardened, I purchased a remnant I beam and packed it with 2x4's in the void areas to minimize reverb if I strike outside the center of the I.
 
This guy's practical design ingenuity is bad ass! Some clever methods that will likely save chasing a few f-ups! Haha! Very slick build process!

 
I've been on the hunt for rail tracks since @elkantlers shared pic of his. The character of that is so DIY fantastic - I would pay more to have that type of anvil than a quality couple hundred pound defined anvil. Pardon the word though it looks badass and fits the comfort of my usual crafting.
It's a royal PITA to find rail track! I tried begging our Whitefish train depot and it was as if I was asking for someone's first born. haha! They were friendly but it was a solid no joy - without room for me to wiggle a bit...

Do you have or would you mind taking a pic of yours? I'm not sure what a "side bearing" is from a rail car.
My apologies for not checking back in sooner. I'll try and get snaps ASAP!
 
Check out a Frosty "T" burner. Simple as you know what to build.

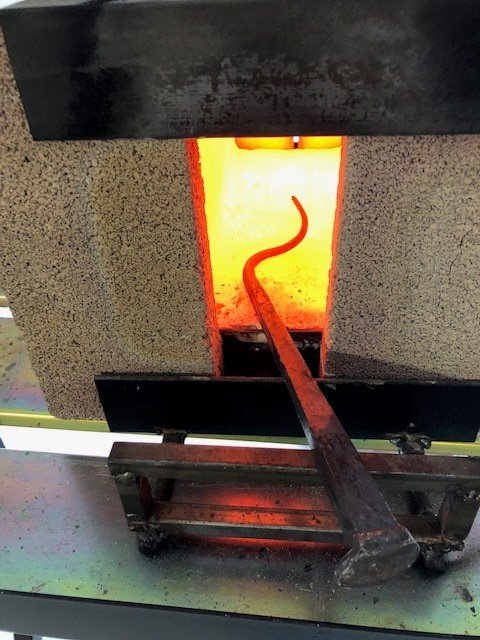
My 2 burner runs on (2) 1/2 inch T burners and produces forge welding heat ( I have successfully welded 9 layers of 1084 and 15n20 together and drew out a billet. Here it is before coating the Kaowool with Satanite.

9x12 forge body layered with (2) layers of 1" of Kaowool, layer of Satanite, and then a HTC-1000 wash. Final interior dimensions are 12x4.5 and with the 1/2 burners, it sips the gas. I can run the forge at 3 psi and achieve 1700 degrees.

IMG_3156.jpg

and running at 3 psi.

turned.jpg
 
Last edited:
I've watched "Forged In Fire" a few times.
I find it comical that the socalled "experts" want some specific task performed in an abbreviated time frame.
I want to ask them, "Can YOU build a really nice blade in one hour?"
I'd wager not one of them could do much better and they want to judge the contestants abilities?

This brings to mind the old saying, "We the unwilling have been doing the impossible for the ungrateful. We have done so much for so long with so little, we are now able to do anything with nothing!"
Watch the "Beat the Judges" version. I'm not sure Doug Marcaida forges, but he's not presented as a bladesmith.
 
Any gurus have a reason I can not use this for the interior fire enclosure?


My thought was to offset two layers for the base.
Rated up to 2700°F


Edit added:

Newb Q:
@pre6422hornet
(2) layers of 1" of Kaowool, layer of Satanite, and then a HTC-1000 wash

This retains the heat from escaping? Whereas straight fire brick would dissipate or?
 
Last edited:
I personally think a 40lb propane tank is overkill, unless you're doing production bladesmithing for long periods at a time. A properly tuned burner uses very little fuel.

I use the same kind of burner Hornet does. Found one pre-assembled on eBay for $15, although I had to change out the MIG tip and trim it to get it to burn correctly. Regardless of the type of burner, do not use galvanized pipe, as it will release toxic vapors when it gets hot. If you have to use galvanized, I'm pretty sure there is a method to remove the coating using acid. I have build instructions for a Frost-T burner. I can send them to you if you'd like.

I use the Rutland fire bricks to block off the ends of my forge. I also used a brick in the floor of my forge and it seems to work well. You might be able to build a simple forge with them, although I don't know how efficient it would be. Would need to seal the cracks all the way around the forge to contain the heat.

Like Pre6422hornet, my forge is lined with 2 layers of 1" Kaowool that was then coated. I used refractory cement instead of Satanite. Regardless of what you use, it is important to coat the Kaowool so you don't risk inhaling the fibers as the forge burns. The coating will also enhance the efficiency of the forge. For my forge, I took a small helium tank and cut the ends off. One 1" layer of Kaowool all the way arond, then a fire brick on the bottom and a second 1" layer of Kaowool in a C chape running around the forge from one side of the brick to the other. Coat the whole thing with refractory, then follow the curing process.
 
Watch the "Beat the Judges" version. I'm not sure Doug Marcaida forges, but he's not presented as a bladesmith.
100% this. Ben Abbot is an animal. David Baker really surprised me too with what he produced in the given time.
 
A


This retains the heat from escaping? Whereas straight fire brick would dissipate or?
Fire brick is essentially a heat sink. It will take your forge longer to heat up to temp therefore it will use more fuel. Satanite, Castolite 30, Mizzou and the Kiln wash are all reflective. They bounce the heat back.

I do use the brick for doors front and rear.

And as NM guy stated, Kaowool will release fibers into the atmosphere when heated to forging temps UNLESS it is rigidized and coated. You basically spray rigidizer on it, let it dry, fire the forge and it will become hard as a rock. Then you coat it with the castable of your choice.
 
All the above except a welder. I have one, but don't use it for knives. I've never made Damascus but I think it would help in that process. I also use a Oxy/Acetylene torch but I wouldn't say it's essential.

You probably should have a drill or drill press. a Bench vice is very useful also.

A few things you have to buy, but most things you can make or get by. Pretty much anything that will hold liquid can be used as a quench tank. I started out using a piece of railroad track as an anvil. Then made an Anvil out of several pieces of track.

View attachment 177439
Does this comprise of approx 3 1/2' - 4' of track?
 
The two short pieces are 9.5" and the long piece with the horn is 13". 32" total.
 

Forum statistics

Threads
113,676
Messages
2,029,419
Members
36,279
Latest member
TURKEY NUT
Back
Top