Use Promo Code Randy for 20% off OutdoorClass

First attempt at pedestal mount

OntarioHunter

Well-known member
Joined
Sep 11, 2020
Messages
5,980
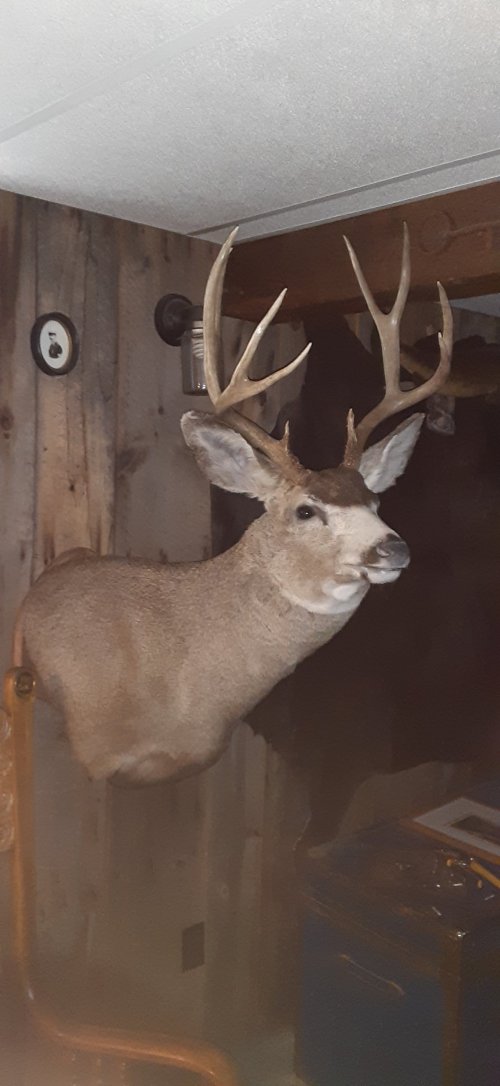
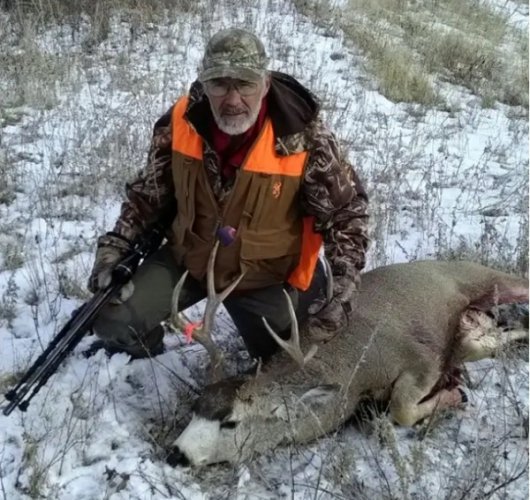
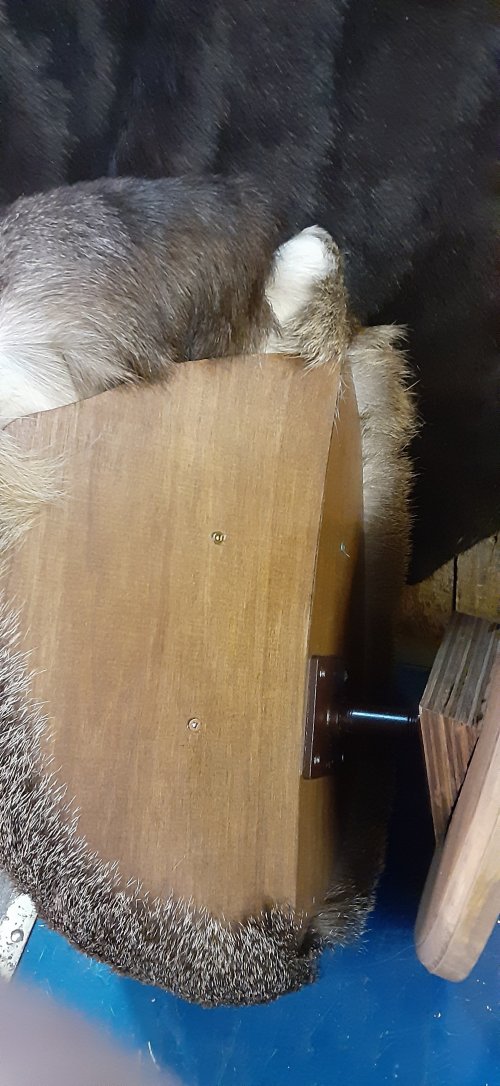
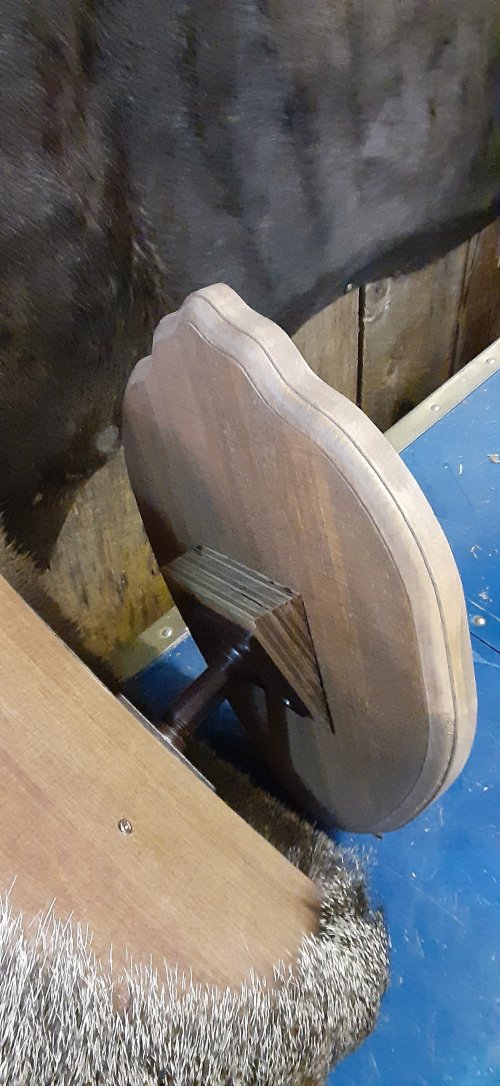
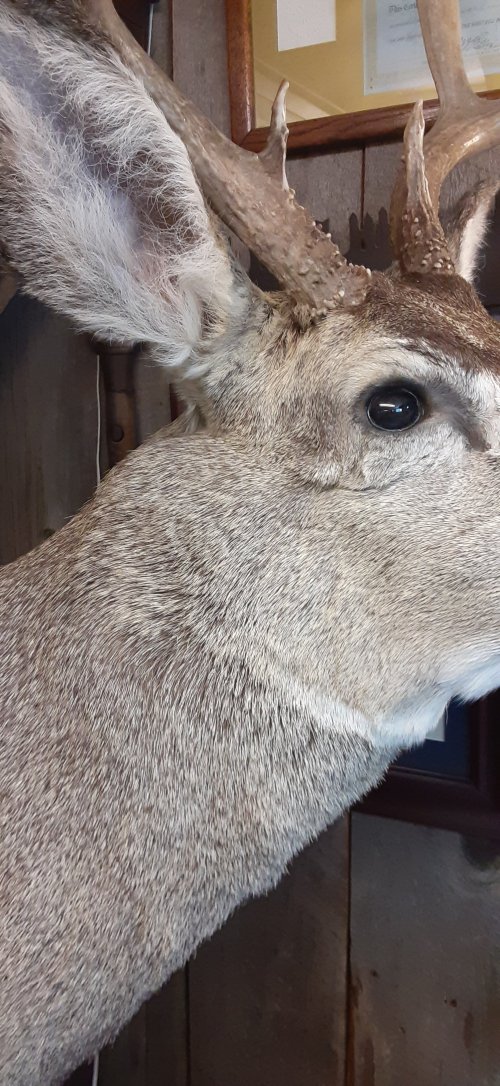
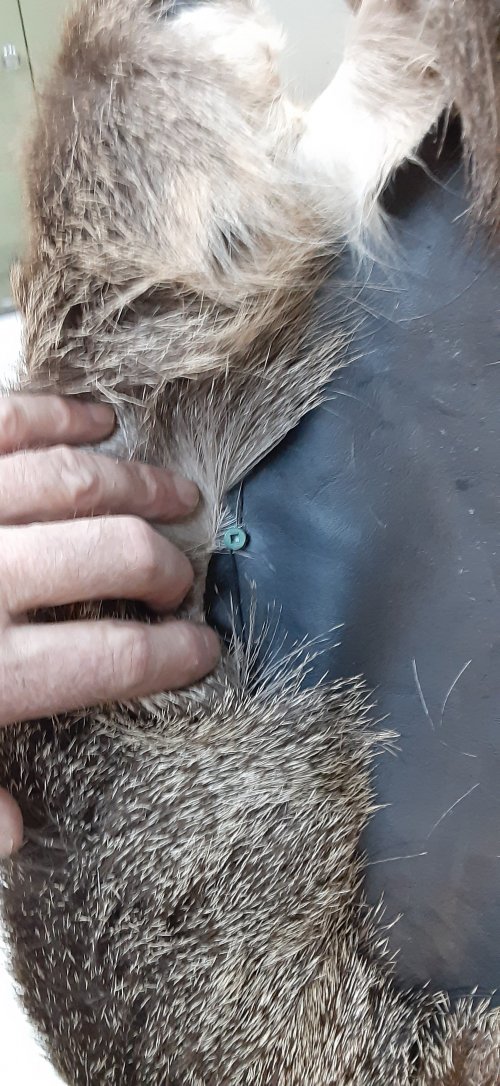
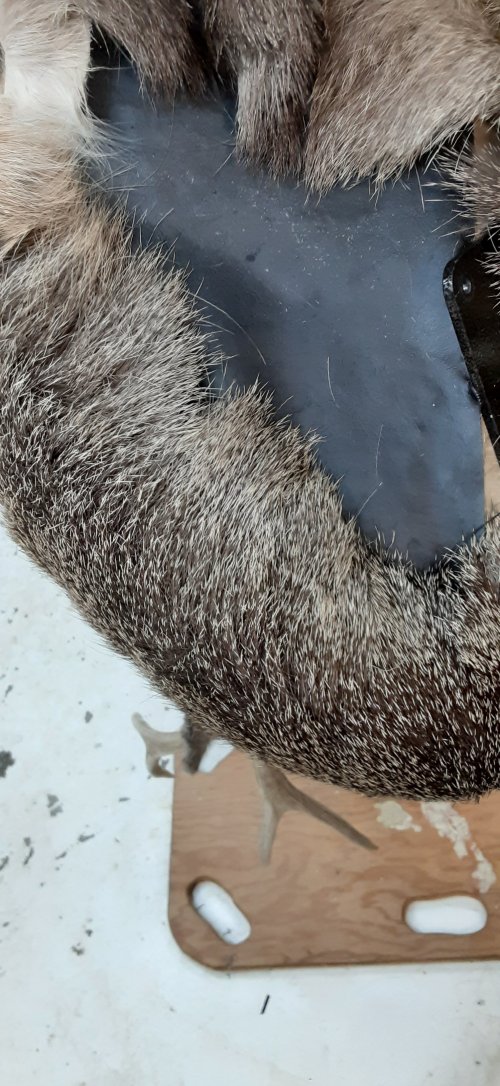
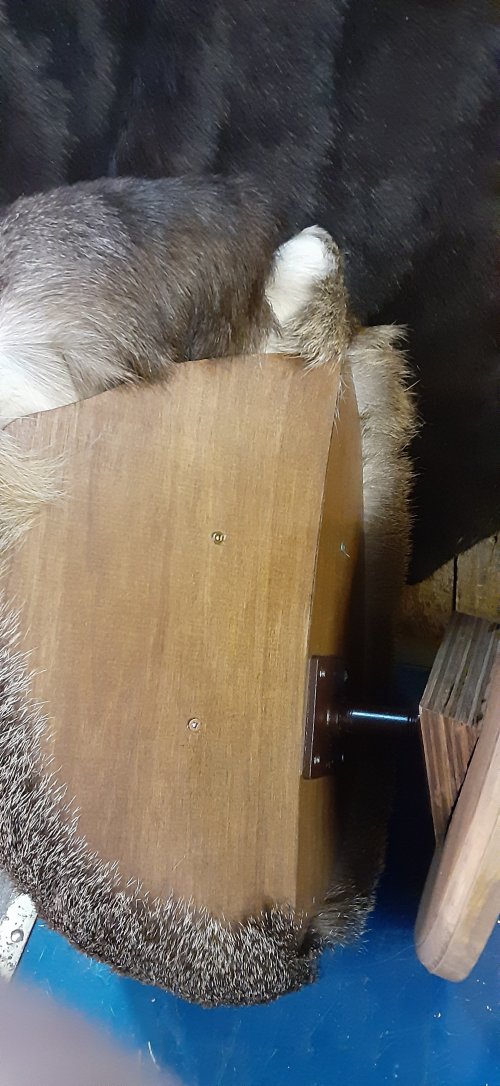
We finally finished this pedestal mount of buck I shot 2018. Not a whopper but decent and we needed something to practice on. Two client pedestal mounts are waiting as well as my kudu from 2019. It turned out well. Antler positioning was just a bit off but not very noticable. Quite the learning process. Had a helluva time with the preorbital glands. After three failed attempts I figured out a unique way to hold them together during shrinkage. Also finishing up the back was tricky. I wound up stitching the hide to screws. Worked great because it allowed me to pull the hide tight as I worked and still be able to see what I'm doing. Wrestling with a staple gun in one hand and pulling hide with the other just doesn't work. Also, half the back was only foam and staples don't stick in it worth a damn. 2" construction screws worked great anchoring to the foam. I think sheetrock screws might be better because they have wider head but I had no problems with construction style. Pull the thread around screw head and half hitch to hold. I used heavy waxed leather sewing thread (hint: to thread the needle, dip fingertip in latex urethane and then compress thread end between fingers - that way thread tip stays flat and doesn't unravel). Then I covered it all with 1/8" mahogany plywood with a nice finish. Had to be two pieces seamed together because pedestal form has a back that is angled in the middle. I am VERY short on space in this little house, so I had to abandon plans to build a cherrywood pedestal box. Instead I designed a wall hanger with plaque. The taxidermy supply company sells hangers but they stick out too far. I used small half inch pipe coupling and screw base fittings. Also had to make an insert to tilt the mount 15 degrees from wall. My old radial arm saw saved the day there.

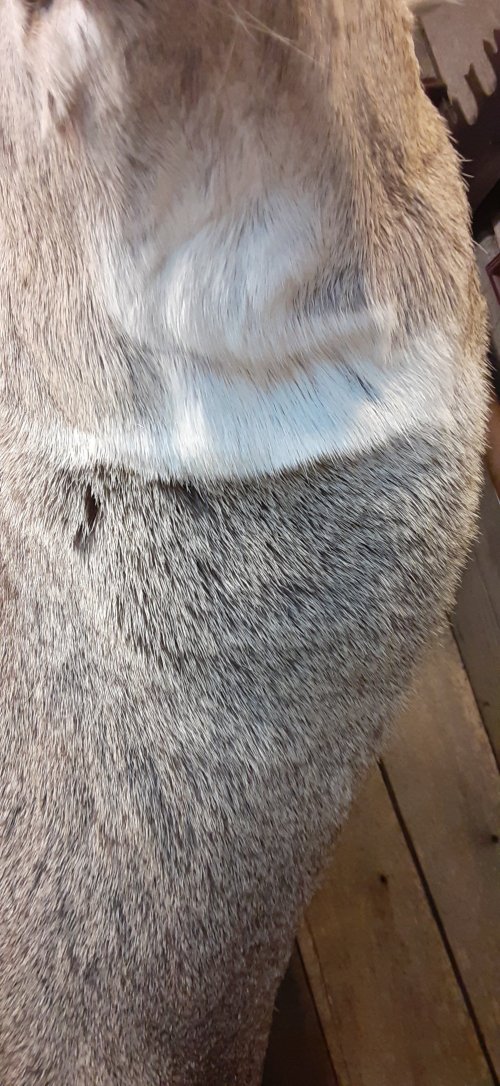
This buck is an interesting specimen. He has an unusually white face for his age and several unique matching cowlicks in heavy winter fur on both sides of his face. Lots of character but not grotesque.
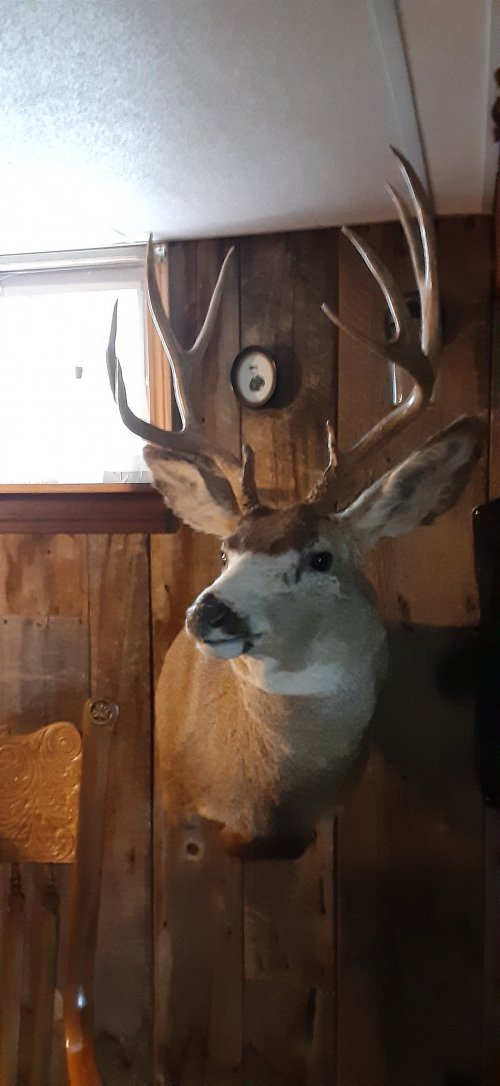
20210622_095337.jpg20210622_095735.jpgBuck 2018.jpg
 
Last edited:
that's the ugliest throat patch I have ever seen on a mule deer. it sure throws the look of the mount off big time@ . sorry.
 
Just would like to give you an idea when doing pedestal mounts. I usually take a dremel tool and go inside the outer edge of the form about 3/4" or so and go all the way around the pedestal portion of the form using the dremel tool bit to form a slot. Before I ever mount the animal I take a piece of lambs skin leather (it is very thin) chocolate in color and lay it on the ped portion and with a black sharpie trace the shape of the form. Cut it out with scissors and set aside. When the animal is mounted cut just long enough past the form so you can tuck it into the trough you made with the dremel. Then apply your hide paste to exposed foam on back of form and gentle lay the lamb skin leather in place and tuck it into the same trough as hide.
Its a lot easier than I described and it is very nice.
Hope this helps. If you need pics let me know and I will see what I can come up with for you.
I read about that method on the net but the description was not very clear. Because half the base was plywood almost to the edge I couldn't visualize cutting a trough through it without extreme difficulty. And the author used a knife. That really didn't make sense. The plaque is homemade to resemble barnboard. We are short on the factory models and supplier is out of stock. I can't buy the walnut or oak for what McKenzie sells the premade plaques. Clients' critters get the good stuff.20210622_213606.jpg20210622_214434.jpg
 
that's the ugliest throat patch I have ever seen on a mule deer. it sure throws the look of the mount off big time@ . sorry.
I'm not sure there is such a thing as a "normal" looking mule deer throat patch. So much variety. Everything from the much coveted (why?) double throat patches to bow tie, hour glass, oval etc. Very often they are lopsided and asymmetrical. This guy's is sort of hour glass but irregular in shape and asymmetrical. It is also layered in three tiers. The top tier is essentially a backwards pointing goatee under his chin. He is unique for sure but it seems most usually are. I'm glad you brought that to my attention. I never paid much attention to throat patches before. Something to keep in mind when shopping for capes.
 
Ontario hunter,
Considerations. The throat patch seems twisted or rolled. The hair patterns seem off beyond the throat patch around up to top of neck. Sure looks so anyhow and getting hair patterns to line up is key. Another thing, you mention pull tight. I’d never pull any hide tight, it causes drumming. Something to consider as well as making sure the tan is stretchy to help with any rolling. Hope it helps
I guess "tight" is a bit misleading. The hide wasn't pulled so tight that I couldn't make adjustments around eyes and armpits after rehydrating. @glass eye and I tossed around the throat patch and neck hair issue in another recent thread. Conclsion is it's just weird hair. Buck had several cowlicks on his face, corner of his mouth, and under chin. The throat patch is irregular in shape and oddly terraced. Almost looks like I cut his throat when dressed and then tried to suck it close when we mounted it. But I'm not that stupid. I quit slashing deer throats forty years ago. Too bad the field photo has him laying with chin on the ground. There are no bumps or rolls in the hide or form that I can feel. It fit very nicely on the form. My daughter did a good job of measuring before the order. The "mane" on the back is lined up well and armpits are as they should be. Everything seems to be in the correct position. This buck just had a bad hair day ... or more likely life. Here's better photos of under chin which show twisted hair and misshapen neck patch (dark spot from handling as I just moved the mount - carded out). Note white neck patch is only a sliver on the buck's right side. That's all there is to it. Nothing tucked or rolled. Also attached is photo of the cowlick on the side of his neck. Other side was also somewhat "fluffy" in that area. 20210626_145246.jpg20210627_164309.jpg
 
I think it looks good Ontario. I never saw his chin while he was alive but can totally believe the cowlick thing. We mount whitetails with cowlicks on their throat, on the back of the neck, between the shoulders, etc.

The only thing that concerns me is the part about having to stretch hide to staple it. I'm not an actual taxidermist, just an assistant, but my boss and I work shoulder to shoulder on multiple mounts a day and I do ALL the stapling and sewing - so I do know a bit about that.

Generally you will want the hide to be long enough and supple enough that it takes no real effort to lay it in place and punch the staple into the wood backing. (Now on pedestals, I use tiny brads to attach to the foam, concave part but the idea is the same.) But the stapling part should come easy, simply by laying the hide over and stapling then cutting away the slack.

Great end result though man and nice buck.
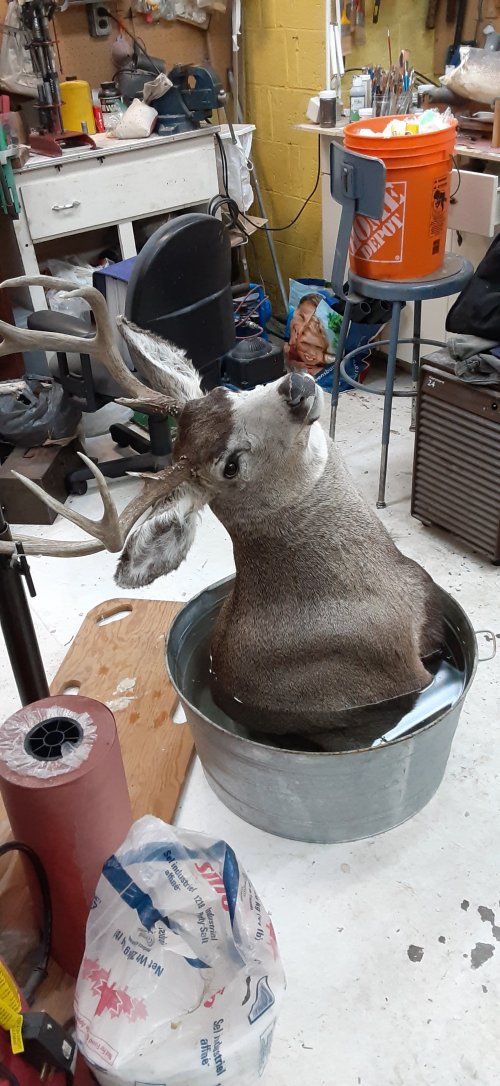
Stretching was perhaps not the right word. My daughter had to leave the buck half finished because I had to quarantine and she couldn't get back into the house. The back end was left hanging and dried out. I rehydrated it by suspending in a tub.20210530_102921.jpg
So the hide was perhaps not as supple as you might normally experience. I used construction screws and thread to pull the hide into place. Staples pulled out of foam. They work okay on the wood half but it's still a battle with a hand powered staple gun. 20210605_152551.jpg20210605_152525.jpg
Then I covered it with thin plywood stained and finished.20210622_213606.jpg
A different way of doing things but it worked. No worries about hide coming loose, that's for sure.
 
MTNTOUGH - Use promo code RANDY for 30 days free

Forum statistics

Threads
113,671
Messages
2,029,143
Members
36,278
Latest member
votzemt
Back
Top